Hyundai Creta: Manual Transaxle Control System / Shift Lever
Components and components location
| Components |
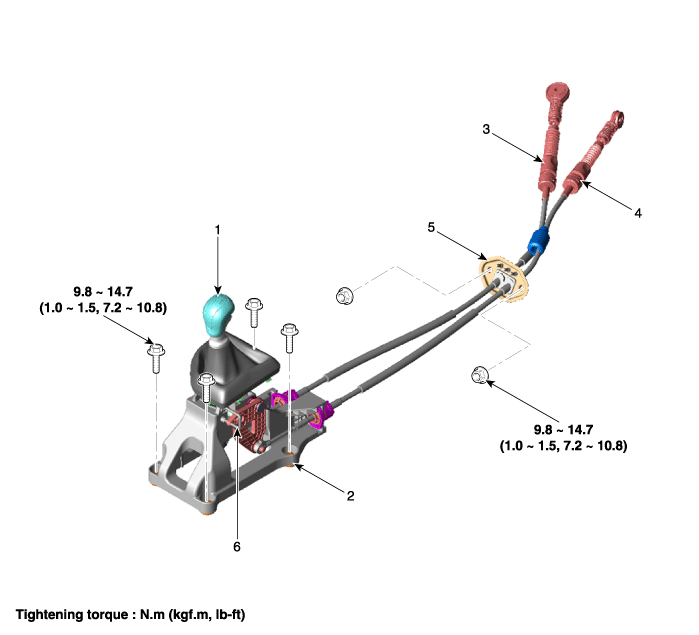
| 1. Shift lever knob & boots 2. Shift lever assembly 3. Shift cable |
4. Select cable 5. Retainer 6. 4th fixed pin |
Repair procedures
| Removal |
| 1. |
Remove the shift lever knob & boots (A) after turning in the counter
clock-wise direction.
|

| 2. |
Remove the floor console assembly.
(Refer to Body - "Floor Console")
|
| 3. |
Remove the air duct (A).
|

| 4. |
Disconnect the shift cable (B) and select cable (C) after removing the
snap pin (A).
|


| 5. |
Remove the shift lever assembly (A) after removing the bolts (B-4ea).
|

| Installation |
| 1. |
Install in the reverse order of removal.
|


 Control Cable
Components and components location
Components
1. Shift lever knob & boots
2. Shift lever assembly
3. Shift cable
4. Select cable
5. Retainer
6. 4th ...
Other information:
Hyundai Creta GS 2014-2024 Service Manual: Special service tools
Special Service Tools
Tools
(Number and name)
Illustration
Use
09200-3N000
Engine support fixture (Beam)
Removal and installation of the transaxle.
Use this beam (SST No. : 09200-3N000) with t ...
Hyundai Creta GS 2014-2024 Service Manual: Front Wheel Speed Sensor
Components and components location
Components
1. Front wheel speed sensor cable
2. Front wheel speed sensor
Repair procedures
Removal
1.
Remove the front wheel speed sensor mounting bolt (A).
...
© 2017-2024 www.hcrmangs.com
